


Home / How to tape / Back taping / How to tape your sacroiliac joint (SI joint)
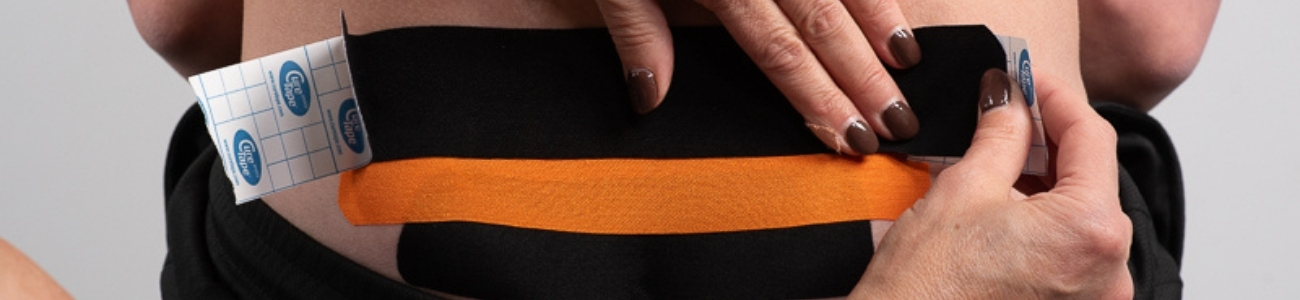
Are you wondering which type of tape can support back pain linked to the SI joint? This joint is a firm connection between the spine and the pelvis. When it becomes overloaded, it can lead to discomfort in the lower back with pain spreading to the buttocks, pelvis and groin.
On this page, we demonstrate how you can apply this taping technique yourself. Since it involves the back, it is advisable to ask someone to help you with the application.
Preparation for taping the SI joint
Form: I-strips
Number of strips: 3 strips of approximately 10, 15 and 20 cm
Technique: ligament technique with around 50% stretch in the middle section, anchors applied without stretch
Measuring and cutting the tape
Step
1
Applying the tape to the SI joint
Step
2
Step
3
Step
4
Step
5
Step
6
Step
7
For these self-taping instructions, I have chosen applications that are straightforward to apply on your own. When it comes to back taping, however, it is usually advisable to have someone assist you. To ensure the treatment is carried out safely, I provide practical tips to keep in mind before, during, and after taping. These recommendations are based on my many years of professional experience. If your symptoms continue, always consult a therapist or your GP.
Christina Peter
Physiotherapist and Taping Instructor

Disclaimer:
Please note: we emphasize that the suggested tape applications and the information on our website regarding the possibilities of the Medical Taping Concept are not yet scientifically proven. The statements and examples mentioned are based on years of experience from patients and trained therapists.
Contraindications for not using tape: pregnancy, open wounds, bone fractures, unexplained complaints, allergies and skin conditions, medication use such as blood thinners, thrombosis, and fever.
Always consult a specialist before applying tape in these cases.
CureTape® Classic Wide 7,5 cm
CureTape® 2,5 cm – 2 rolls
CureTape® 1 cm – 5 rolls
CureTape® Classic
CureTape® Sports Extra Sticky
CureTape® Art
CureTape® Punch
CureTape® Beauty Face Tape Tube: 2 rolls + Facial Cups
CureTape® Beauty Face Tape Pre-cut (60 strips)
CureTape® Beauty Face Tape 2,5 cm – 1 Roll
CureTape® Beauty Face Tape 2,5 cm – 2 Rolls
CureTape® Beauty Face Tape
MyCureTape® Sports Pre-Cut (36 pcs)
MyCureTape® ART Tube
MyCureTape® Sports Tube
CrossLinq® Acupressure Taping Handbook
MTC® handbook – Decompressive Techniques
MTC® Handbook – Medical Kinesiology Taping
CureTape® The Ultimate Kinesiology Taping Guide
CureTape® Pen
CureTape® Standard Scissor
High Quality CureTape® scissor
CureTape® Clean-Skin Pre-Tape Spray
FASCIQ®Adhesive Spray
CureTape® Cutter
CureTape® Giant – Sports
CureTape® Giant – Classic
CureTape® Sensor Patches Mix Sports Extra Sticky (8 pcs)
CureTape® Sensor Patches Sports (25 pcs)
CureTape Boob Tape N°1
CureTape® Pen
CureTape® Classic Wide 7,5 cm
CureTape® 2,5 cm – 2 rolls
CureTape® 1 cm – 5 rolls
CrossLinq® Acupressure Patches
CrossLinq® Acupressure Taping Handbook
MTC® handbook – Decompressive Techniques
MTC® Handbook – Medical Kinesiology Taping
CureTape® Giant – Sports
MyCureTape® Sports Pre-Cut (36 pcs)
CureTape® Sensor Patches Classic & Art Mix (8 pcs)
CureTape® Sensor Patches Art (25 pcs)
CureTape® Sensor Patches Classic (25 pcs)
CureTape® The Ultimate Kinesiology Taping Guide
CureTape® Standard Scissor
High Quality CureTape® scissor
CureTape® Clean-Skin Pre-Tape Spray
FASCIQ®Adhesive Spray
CureTape® Giant – Classic
CureTape® Cutter
CureTape® Gentle Kinesiology Tape for Sensitive Skin
CureTape® Beauty Face Tape Tube: 2 rolls + Facial Cups
CureTape® Beauty Face Tape Pre-cut (60 strips)
CureTape® Beauty Face Tape 2,5 cm – 1 Roll
CureTape® Beauty Face Tape 2,5 cm – 2 Rolls
MyCureTape® ART Tube
MyCureTape® Sports Tube
CureTape® Punch
CureTape® Art
CureTape® Sports Extra Sticky
CureTape® Beauty Face Tape
CureTape® Classic
Questions or need help?
+31-53-4781900
info@curetape.com

Recommended for you


